
Building open-box bed for Praga V3S 1/35
My most complex scratch building process up to date.
It took me few months to get it done. A lot measuring, counting, re-counting and testing.
I experimented a lot with different materials and shapes to achieve desired effect.
I wanted bed to be fully functional, including reproduction of the hydraulic system, so all had to be very accurate.
Best way is not to think about all the details in advance. If I knew what everything I need to get through, I wouldn’t have even started.
Besides fresh memory of an old V3S my father owned when I was young boy, I found hundreds of reference photos.
Anyway, this process confirmed how much easier it is to proceed once you have experience with real car. I don’t remember all of the details, but I knew for sure how the basic shapes looked like from different angles. More importantedly, I knew how those parts you all see in pictures moved or worked.
The fact is that open-box bed V3S is the least documented V3S model. I mean when speaking about random reference photos you can google. The best reference gallery I found for open-box bed V3S is this one.
Let’s move on a bit:
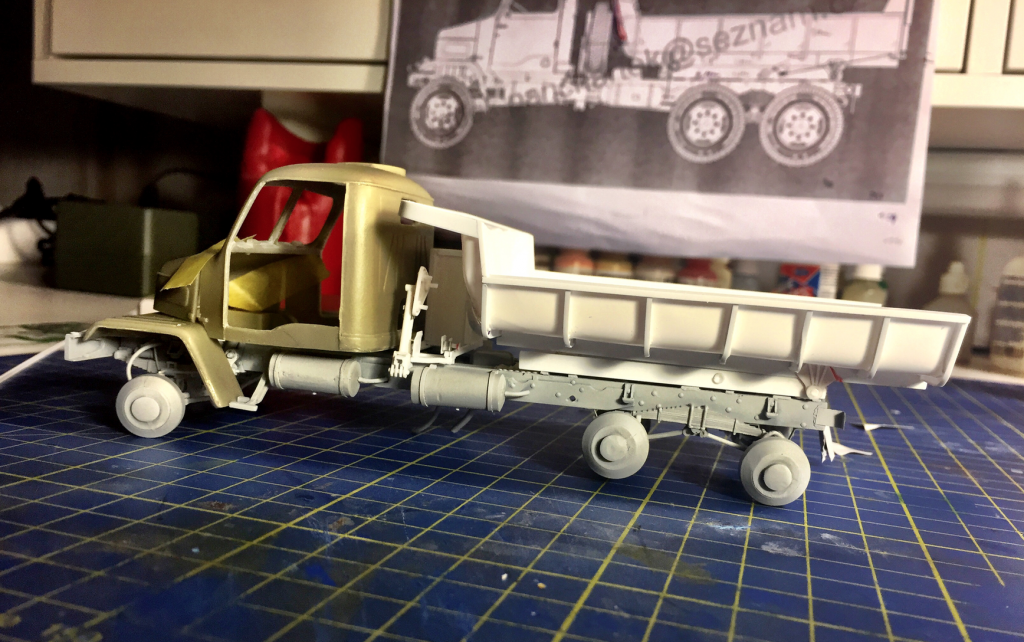
0. It was not easy to find V3S kit, as there were not many of them produced. An most of them are older production year. So to get them was not an easy job to accomplish. I think I ordered one from Germany.
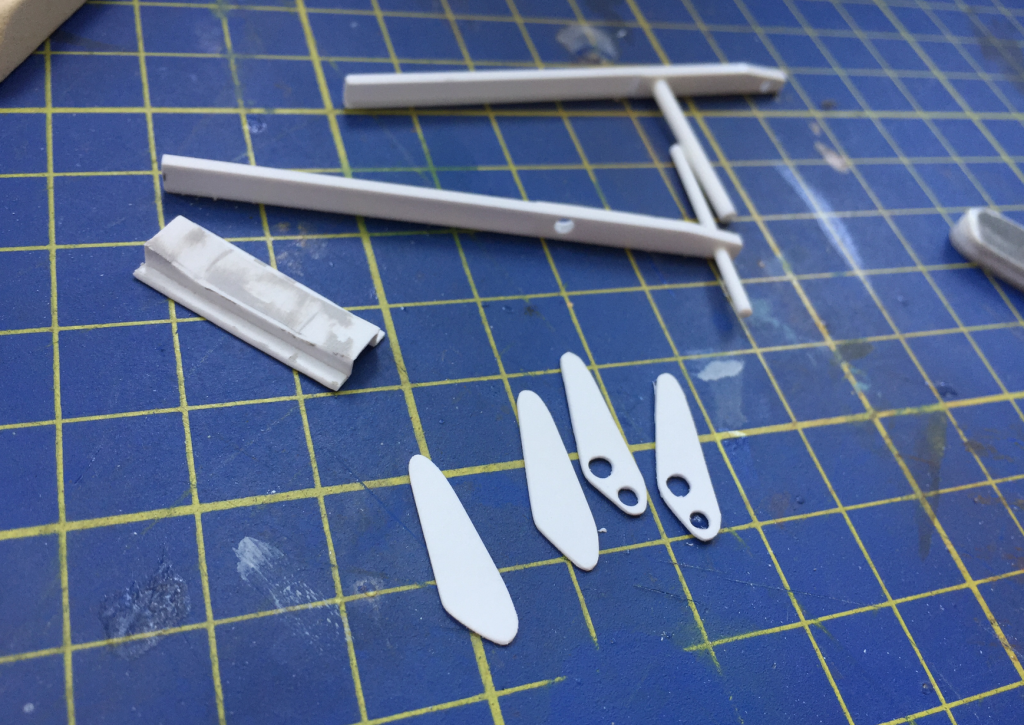
1. The resin kit I order was „wardrobe“ version with longer chassis, so I had to shorten it a bit. Once I got the axles and all the wiring ready I could move on to the bed. I started with the lower skeleton holding the bed (white).


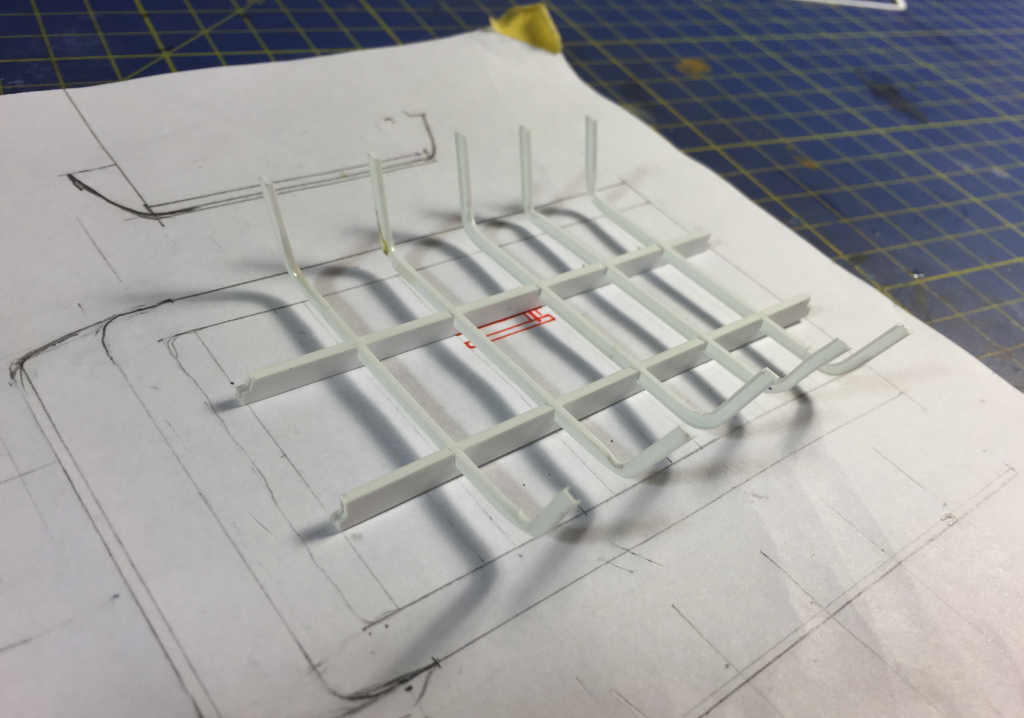
2. As I couldn’t find any blueprints, I had to calculate everything based on basic entry dimensions I had. I simply sketched my own blueprints on a piece of paper. With try-fail-try approach I drafted key views – frontal, sideways, etc.


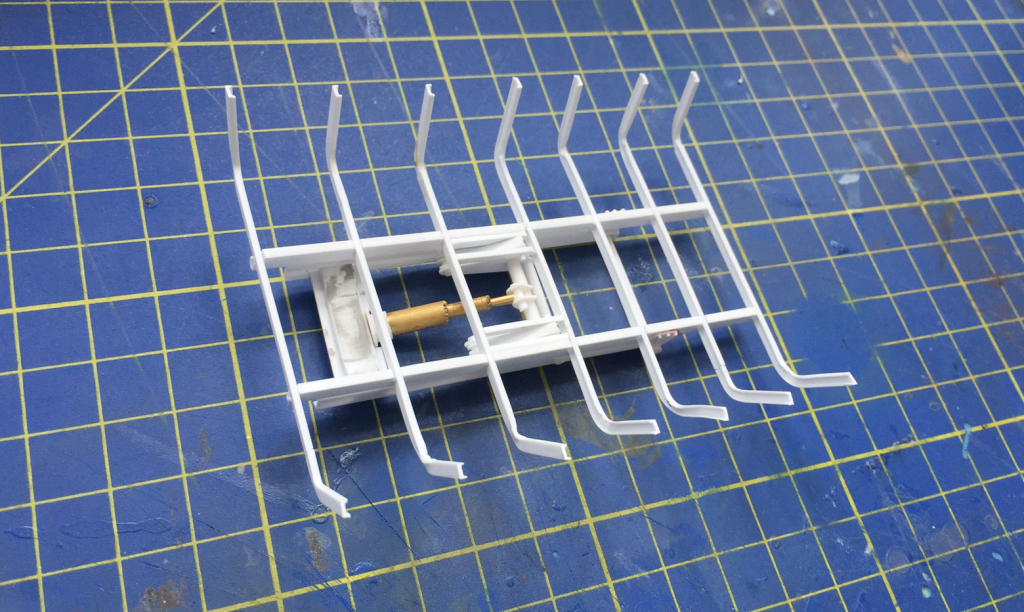
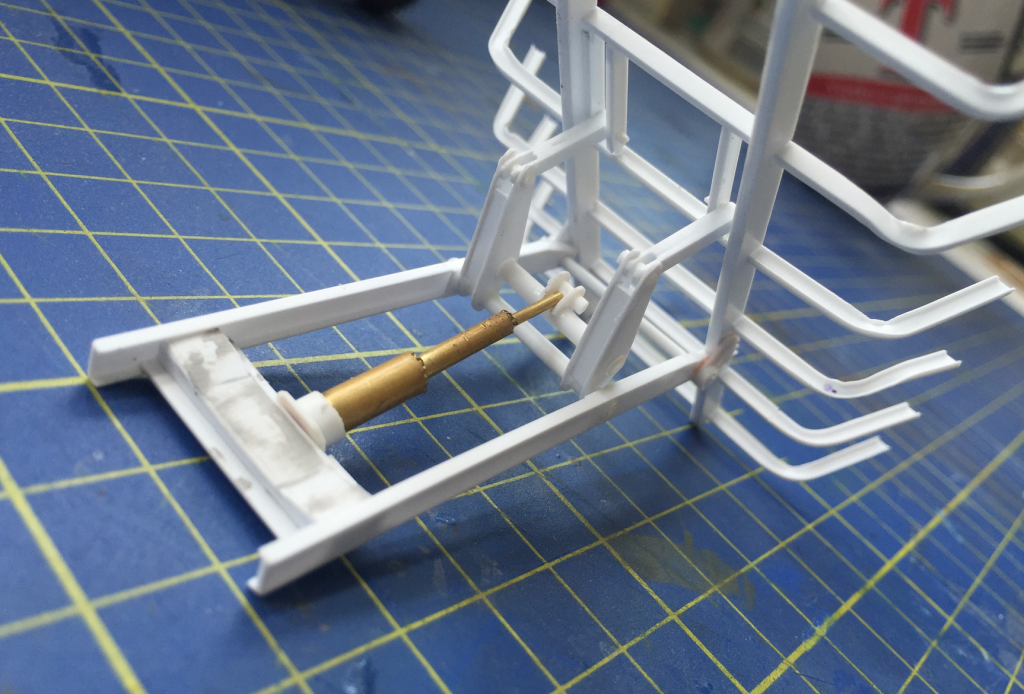
3. Reproducing the hydraulics was not such a problem that I initially thought. As I worked carefully and always kept an eye on the next step, once I got the telescopic tubes working, all fitted well. Even lifting and closing the bed worked super smoothly, with no tensions or complications. 

4. Laying the bottom of bed – that was something I was really afraid of. I bought the finest plastic sheet available for that. First part went really easy. While cementing the sheet to the cross arms, the sheet got a bit saggy in between arms. Beginners luck it is called. So formed dents combined with tiny scratches from nails or bending the sheet, it all gave only realistic look of the bed.
![]()
5. Building and fitting the forehead of the bed was the most complicated and slowest part of the whole process. To many shaggy parts, to many curves to be fitted together at once. And finally, it all was suppose to fit the overall car body, precisely copying the shape of the cabin and fitting to the scratch built toolbox mounted to the chassis. And I nearly forgot about the roundish bottom parts of the bed and forehead where it all was suppose to blend together.


5. In comparison to previous step, building the back closing panel was really easy. I just had to be careful that the part is symmetrical and clicks properly when it is closed. Of course, I checked also that it opens automatically and easily when the bed is lifted.


